
Illuminating the Path: A Comprehensive Guide to 1997 Jeep Grand Cherokee Headlights
Illuminating the Path: A Comprehensive Guide to 1997 Jeep Grand Cherokee Headlights jeeps.truckstrend.com
The 1997 Jeep Grand Cherokee (ZJ generation) holds a special place in the hearts of many automotive enthusiasts, revered for its robust off-road capability, comfortable interior, and distinctive styling. While its rugged charm is undeniable, one critical component often overlooked, yet vital for safety and aesthetics, is its headlight system. The headlights on your ’97 Grand Cherokee are more than just lights; they are your primary tool for navigating dark roads, ensuring visibility in adverse weather, and projecting the iconic look of this classic SUV. Understanding, maintaining, and potentially upgrading these headlights is essential for any owner, ensuring both safe travels and preserving the vehicle’s integrity.
This comprehensive guide will delve into every aspect of 1997 Jeep Grand Cherokee headlights, from their original design to common issues, upgrade options, and practical maintenance tips.
Illuminating the Path: A Comprehensive Guide to 1997 Jeep Grand Cherokee Headlights
The Original Glow: Understanding the Stock 1997 Grand Cherokee Headlight System
The 1997 Jeep Grand Cherokee came equipped with a composite headlight assembly, a significant upgrade from the sealed beam units found in many older vehicles. This design allowed for replaceable bulbs within a fixed housing, offering better light distribution and a more modern aesthetic.
Key Components of the Stock System:
- Headlight Housing: A clear, molded plastic (polycarbonate) lens with an integrated reflector designed to direct light from the bulb into a specific beam pattern. These housings are designed to bolt directly into the vehicle’s front fascia.
- Bulbs: The ’97 Grand Cherokee typically uses two distinct halogen bulb types per side:
- Low Beam: Housed by a 9006 (HB4) bulb, responsible for general illumination and standard driving.
- High Beam: Utilizes a 9005 (HB3) bulb, providing additional light for maximum visibility, typically used on unlit roads.
- Wiring Harness & Connectors: Connects the bulbs to the vehicle’s electrical system, delivering power.
- Mounting Hardware & Adjusters: Secures the headlight assembly to the vehicle and allows for vertical and horizontal beam alignment.
From the factory, these halogen systems provided adequate light for their time, meeting Department of Transportation (DOT) standards for road legality. However, over two decades of exposure to the elements and advancements in lighting technology mean that the original performance often leaves much to be desired by today’s standards.
Common Challenges & Deterioration Over Time
Like any automotive component, the headlights on a 1997 Jeep Grand Cherokee are susceptible to wear and tear. Several common issues can significantly diminish their performance and appearance:
- Lens Hazing/Yellowing: The most prevalent problem. The polycarbonate lenses are exposed to UV radiation from the sun, which breaks down the plastic over time, causing it to oxidize, yellow, and become cloudy. This drastically reduces light output and makes the headlights appear dull.
- Cracked or Broken Housings: Accidents, minor impacts, or even extreme temperature fluctuations can cause cracks or breaks in the plastic housing, allowing moisture and dirt to enter, further damaging the reflector or wiring.
- Dim or Burned-Out Bulbs: Halogen bulbs degrade over time, producing less light even before they completely burn out. Age, voltage fluctuations, or rough roads can shorten their lifespan.
- Wiring Issues: Corroded connectors, frayed wires, or poor grounding can lead to intermittent operation, flickering, or complete loss of power to the headlights.
- Poor Beam Pattern/Alignment: Misaligned headlights can blind oncoming drivers or fail to illuminate the road effectively, regardless of bulb brightness. This can be caused by impacts, improper installation, or simply age-related sag.

Addressing these issues is crucial for both safety and maintaining the vehicle’s value.
Enhancing Your View: Headlight Upgrade Options
For many 1997 Grand Cherokee owners, the desire for better nighttime visibility and a refreshed aesthetic leads them to consider headlight upgrades. Several options exist, each with its own pros and cons:
-
Performance Halogen Bulbs:
- Description: These are direct replacements for your 9005 and 9006 bulbs but use specialized filaments and gas mixtures to produce a brighter, whiter light (e.g., Sylvania Silverstar, Philips X-tremeVision).
- Pros: Easy plug-and-play installation, relatively inexpensive, DOT compliant, improved brightness over standard halogens.
- Cons: Still halogen technology, so not as bright as LED or HID; shorter lifespan than standard halogens due to higher filament temperatures.
-
LED Conversion Kits:
- Description: LED bulbs designed to fit into existing halogen housings. They use Light Emitting Diodes for illumination, often featuring integrated fans for cooling and external drivers.
- Pros: Significantly brighter than halogen, lower power consumption, longer lifespan, instant-on illumination, often a whiter, more modern light color.
- Cons: Critical Consideration: LED bulbs in reflector housings (like the ZJ’s stock ones) often create a poor, scattered beam pattern. This can result in significant glare for oncoming drivers and hot/dark spots on the road, compromising actual usable light. May require anti-flicker modules (resistors) due to the ZJ’s electrical system. Legal in some areas, but not universally DOT approved for reflector housings.
-
HID (Xenon) Conversion Kits:
- Description: High-Intensity Discharge lighting uses an electrical arc to ignite Xenon gas, producing very bright light. Kits typically include HID bulbs, ballasts (to regulate power), and igniters.
- Pros: Extremely bright, wide light spread, cool color temperatures, very efficient.
- Cons: Significant Drawbacks in Reflectors: Like LEDs, HIDs in reflector housings produce excessive glare and an uncontrolled beam pattern. Installation is more complex, requiring mounting ballasts. Slower warm-up time than LEDs. Legality is a major concern as they are generally not DOT approved for reflector housings.
-
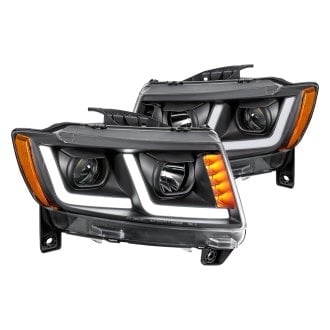
Aftermarket Headlight Assemblies:
- Description: Complete replacement headlight units, often featuring clear lenses, updated reflector designs, or even projector lenses (though true projector retrofits for the ZJ are rare without custom work).
- Pros: Refreshed appearance, clearer lenses (often), some may offer slightly improved beam patterns.
- Cons: Quality varies wildly; cheaper units may have poor optics, inferior materials, or fitment issues. May still suffer from beam pattern issues if not designed correctly for LED/HID conversion.
For the best and safest upgrade, a professional projector retrofit (custom installation of projector lenses into the existing housing) combined with LED or HID bulbs is ideal but very expensive and labor-intensive. For most ZJ owners, quality performance halogens or carefully chosen LED bulbs (with an understanding of their limitations in reflector housings) are the most common choices.
DIY Guide: Replacing and Maintaining Your ZJ Headlights
Maintaining your 1997 Grand Cherokee’s headlights is relatively straightforward and can significantly impact your driving experience.
Tools You’ll Need:
- Phillips head screwdriver
- Flathead screwdriver (optional, for prying)
- Gloves (to avoid touching new bulbs)
- Headlight restoration kit (if applicable)
- Masking tape (for lens restoration)
- Clean cloths/microfiber towels
1. Replacing Headlight Bulbs (9005 High Beam / 9006 Low Beam):
- Step 1: Access: Open the hood and locate the back of the headlight assembly.
- Step 2: Disconnect Power: Gently twist the electrical connector counter-clockwise to unlock it, then pull it straight off the bulb.
- Step 3: Remove Old Bulb: Depending on the bulb type, it will either twist counter-clockwise a quarter turn or be held in place by a spring clip. Carefully remove the old bulb.
- Step 4: Install New Bulb: Crucially, avoid touching the glass of the new bulb with your bare hands. Oils from your skin can create hot spots and shorten the bulb’s life. Hold it by the base. Insert the new bulb, aligning the tabs, and twist clockwise until it locks into place. If there’s a spring clip, re-engage it.
- Step 5: Reconnect & Test: Reattach the electrical connector. Close the hood and test both low and high beams to ensure they function correctly.
2. Headlight Lens Restoration:
- Step 1: Clean & Mask: Wash the headlight lenses thoroughly with soap and water. Use masking tape to protect the surrounding paintwork.
- Step 2: Wet Sanding (Gradual Grits): Following the kit’s instructions, start with a coarser grit sandpaper (e.g., 600-800 grit), wet the lens, and sand in a consistent direction until the yellowing is gone. Progress to finer grits (e.g., 1000, 2000, 3000 grit), changing direction with each grit, until the lens is uniformly hazy and smooth. Keep the surface wet.
- Step 3: Polish: Apply the polishing compound from the kit to a foam pad (or use a power drill attachment) and polish the lens until it becomes clear.
- Step 4: UV Protection: Many kits include a sealant or UV protectant. Apply this as directed to prevent the lenses from re-hazing quickly.
3. Headlight Alignment:
- Basic DIY Method: Park your Grand Cherokee on a level surface 25 feet away from a wall. Measure the height of the headlight bulb’s center from the ground. Mark this height on the wall. The top of the low beam cutoff should be slightly below this line (usually 2-4 inches) on the wall. Use the adjustment screws on the headlight assembly (typically found near the top or side) to adjust the vertical and horizontal aim. It’s best to consult your owner’s manual or a service manual for precise alignment specifications.
- Professional Alignment: For optimal and legal alignment, it’s recommended to have a shop with specialized equipment perform the alignment.
Important Considerations for Your ZJ Headlights
- Legal Compliance: Always check local and national regulations regarding headlight modifications. Many LED and HID kits are not DOT approved for use in reflector housings due to glare concerns.
- Electrical System Load: While LEDs draw less power, higher wattage halogen bulbs or poorly designed HID kits can put undue strain on your aging electrical system. Ensure your wiring is in good condition.
- Beam Pattern Integrity: This is paramount for safety. A bright light with a scattered, unfocused beam pattern is worse than a dimmer, properly focused one. Prioritize a clear, sharp cutoff line for low beams to avoid blinding others.
- Heat Dissipation: LED and HID bulbs generate heat. Ensure the bulb’s cooling system (fans, heat sinks) has adequate space and airflow within the headlight housing.
- Quality Over Price: Especially for aftermarket assemblies or conversion kits, investing in reputable brands often pays off in terms of fitment, durability, and light performance. Cheap alternatives can lead to endless frustration.
- Regular Cleaning: Simple and effective. Keep your headlight lenses clean from dirt, bugs, and road grime for maximum light output.
Price Table: 1997 Jeep Grand Cherokee Headlights
Here’s an estimated price range for various headlight components and services for your 1997 Jeep Grand Cherokee. Prices can vary significantly based on brand, retailer, and location.
| Item/Service | Description | Estimated Price Range (USD) | Notes |
|---|---|---|---|
| Bulbs (Pair) | |||
| Standard Halogen (9005/9006) | OEM equivalent replacement, basic performance. | $15 – $30 | Readily available at any auto parts store. |
| Performance Halogen (e.g., Sylvania Silverstar, Philips X-tremeVision) | Brighter, whiter light output, still plug-and-play. | $30 – $60 | Improved visibility for minimal effort. |
| LED Conversion Kit | Direct replacement style, often requires anti-flicker modules. | $50 – $150 | Varies widely by quality; research beam pattern performance in reflector housings before purchasing. |
| HID Conversion Kit | Requires ballasts, more complex installation; very bright. | $70 – $200 | Not recommended for stock reflector housings due to glare and poor beam pattern unless professionally retrofitted with projectors. |
| Complete Headlight Assemblies (Each) | |||
| Aftermarket Standard Replacement | Direct fit, often clearer lenses than old OEM, replaces the entire unit. | $40 – $80 | Good for replacing severely yellowed, cracked, or damaged housings. Quality can vary. |
| Aftermarket Performance/Projector Style | May offer different aesthetics or "projector-look" lenses (rarely true projectors for direct ZJ fit). | $80 – $200 | Check reviews carefully for fitment, durability, and actual light output quality. |
| OEM/Genuine Mopar Replacement | Original equipment quality, exact fit. Often hard to find new. | $100 – $300+ | Typically only available used or through specialty Mopar parts suppliers at premium prices. |
| Accessories/Services | |||
| Headlight Restoration Kit | For removing haze and yellowing from existing lenses. | $15 – $40 | DIY solution for cosmetic and functional improvement. |
| UV Protectant/Sealant (for lenses) | Post-restoration or new lens protection to prevent re-hazing. | $10 – $25 | Essential for long-term clarity after restoration. |
| Professional Headlight Restoration | Done by detail shops or mechanics. More thorough and lasting results than DIY kits. | $50 – $150 (per pair) | Convenient if you lack time or tools. |
| Headlight Bulb Installation (Labor) | If done by a mechanic. | $20 – $50 (per bulb) | Relatively simple task, often done as part of other service. |
| Headlight Assembly Installation (Labor) | If done by a mechanic. | $50 – $100 (per assembly) | May involve minor trim removal and alignment. |
| Headlight Alignment (Labor) | Ensures proper beam direction for safety and legal compliance. | $30 – $80 | Highly recommended after any headlight component replacement. |
Frequently Asked Questions (FAQ) about 1997 Jeep Grand Cherokee Headlights
Q1: What type of headlight bulbs does a 1997 Jeep Grand Cherokee use?
A1: The 1997 Jeep Grand Cherokee uses 9006 (HB4) bulbs for the low beams and 9005 (HB3) bulbs for the high beams.
Q2: Can I put LED bulbs in my 1997 Grand Cherokee’s headlights?
A2: Yes, you can, but it’s important to be aware of the potential downsides. While LEDs are brighter, their light pattern in the ZJ’s original reflector housings can be scattered, causing glare for oncoming drivers and an uneven light distribution on the road. Some kits may also require anti-flicker modules.
Q3: How do I restore my foggy or yellowed headlights?
A3: You can use a commercially available headlight restoration kit, which typically involves wet sanding and polishing the lens. For severely degraded lenses or if you prefer a professional touch, many auto detail shops offer headlight restoration services.
Q4: Is it difficult to replace the headlight bulbs on a 1997 Grand Cherokee?
A4: No, it’s a relatively easy DIY task. You usually just need to access the back of the headlight assembly under the hood, twist off the electrical connector, remove the old bulb, and insert the new one. No tools are typically required for the bulb itself, though a screwdriver might be needed to remove the entire assembly for better access.
Q5: Why are my headlights dim even with new bulbs?
A5: Several factors can cause dim headlights:
- Hazy Lenses: The most common cause; the yellowed plastic blocks light.
- Poor Wiring/Ground: Corroded connectors or a bad ground connection can restrict power flow.
- Aging Alternator: If your alternator isn’t producing enough voltage, all electrical components, including lights, will be dim.
- Voltage Drop: Resistance in older wiring can cause voltage to drop before reaching the bulb.
Q6: Do I need to align my headlights after replacing them?
A6: It’s always a good idea to check and, if necessary, align your headlights after replacing bulbs or, especially, if you replace the entire headlight assembly. Proper alignment ensures maximum road illumination without blinding other drivers. You can do a basic check yourself or have a mechanic do it.
Conclusion: Illuminating the Legacy
The headlights on your 1997 Jeep Grand Cherokee are more than just functional components; they are integral to its safety, drivability, and classic aesthetic. Whether you’re dealing with dimming bulbs, foggy lenses, or simply seeking to upgrade your nighttime visibility, understanding the options and proper maintenance techniques is crucial. From simple bulb replacements to comprehensive lens restorations or thoughtful upgrades, investing in your ZJ’s headlights ensures that this iconic vehicle continues to illuminate the path ahead for many years to come, keeping you and others safe on the road. Remember, a clear view is a safe journey.


